자바스크립트를 이용하여 GNOME에서 창을 띄어보기


출처: YES! Gnome JS Bindings Documentation is now available! 

#!/usr/bin/gjs

//The previous line is a hash bang which tells how to run the script.
// Note that the script has to be executable (run in terminal in the right folder: chmod +x scriptname)
// Initialize GTK+
var Gtk = imports.gi.Gtk;
Gtk.init(null, 0);
// Create your window, name it, and connect the “click x to quit” function.
// The word “window” is a JavaScript keyword, so we have to
// call it something different.
var mywindow = new Gtk.Window({type: Gtk.WindowType.TOPLEVEL});
mywindow.title = "Hello World!";
mywindow.connect("destroy", function(){Gtk.main_quit()});
// Add some text to your window
var label = new Gtk.Label({label: "Hello World"});
mywindow.add(label);
// Make the label and the window itself visible to the user
label.show();
mywindow.show();
// Let the user run the app
Gtk.main();


chmod +x helloworld.js

./helloworld.js


Hello World!


Buy me a coffeeBuy me a coffee

어제부터 GTK+ 3.0 Reference Manual을 주말마다 짬을 내어 올해안까지 번역해보자는 목표를 세워보았다.

이렇게 목표를 잡고 나서 간한단 GTK+ 프로그램을 C로 작성해보았다.
아래는 C소스코드입니다.

#include <gtk/gtk.h>

GtkWidget* build_label() {
    GtkWidget *label = gtk_label_new("Hello, World!");
    gtk_label_set_selectable(GTK_LABEL(label), FALSE);
    return label;
}

int main (int argc, char **argv)
{
    GtkWidget *win;

    gtk_init (&argc, &argv);

    win = gtk_window_new (GTK_WINDOW_TOPLEVEL);

    gtk_container_add(GTK_CONTAINER(win), build_label());
    gtk_window_resize(GTK_WINDOW(win), 300, 200);

    g_signal_connect(win, "destroy", G_CALLBACK(gtk_main_quit), NULL);

    gtk_widget_show_all (win);

    gtk_main ();
   
    return 0;
}

소스코드를 컴파일 하는 방법은, GTK+3.0 라이브러리가 설치되어야 하며, 아래와 같은 명령어를 작성하여 누르면 컴파일이 됩니다. 실행파일을 열면 아래와 같은 화면이 나옵니다.

gcc `pkg-config --cflags gtk+-3.0`  -o gtkmain gtkmain.c  `pkg-config --libs gtk+-3.0`


조만간 재미있는 GTK+용 프로그램이 나오겠지?ㅎㅎ


Buy me a coffeeBuy me a coffee

2011년 9월 27일 (화) 부로 블로그를 2개 운영하기로 하였습니다.


유명 블로거이신 아크몬드(@archmond)님의 선례에 따라 저의 관심사인 모바일 플랫폼(Apple iOS, Android OS, Windows Phone 7, GTK, MeeGo, LiMO계열) 및 Handset관련한 뉴스 및 개발 전문 블로그 만들고 계속 글을 올릴 계획입니다.

비밀 프로젝트에서 GTK, iOS, Android를 다룬 것에 착안하여 새로운 블로그를 만들게 되었지요.

예전에 놀고 있던 서브블로그에 잠깐 손을 대었고, 주소는 http://m.studioego.info/ 입니다.

일단 2차 도메인을 변경을 하였고, 현재 유행하고 있는 모바일 플랫폼(Platform)인 Android, Windows Phone, iPhone, 그리고 모바일에 적합하게 개발된 Linux 배포판인 MeeGo와 LiMo계열에서 사용하고 있는 GUI Toolkit인 GTK+와 QT를 여기서 소개 및 최신 소식을 올릴 예정입니다.

주로 이 블로그에선 Android와 Windows Phone (주인장은 2010년말 생산된 13인치 MacBookPro를 사용중?!) 그리고 GTK+를 중심으로 포스팅을 할 예정입니다. 

 Android에 대해선 예전에 프로젝트 하면서 정리한 내용, 그리고 Android Developer Blog의 내용을 주로 전달 할 예정이며, MeeGo는 공식 MeeGo 사이트에서, GTK+ 내용은 Ubuntu 중심으로 Web UPD8GNOME Mailing의 내용을 언급하며 업데이트를 하겠습니다.

 이제 돈좀 모으면 MeeGo 기반 Nokia N9와 조만간 나올 Nokia의 Windows Phone을 구입하여 자랑 할겸 블로그에 개발 내용을 하루에 한개씩 포스팅을 하겠습니다.


http://m.studioego.info/  으로 바로가기

Buy me a coffeeBuy me a coffee


GTK+ 3.2가 2011년 9월 25일(일)에 출시되었습니다.


GTK+ 3.2.0에서는 2가지 중요한 실험적인 기능이 포함되었습니다.

  1. HTML5을 사용하는 웹 브라우저 안에서 GTK+어플리케이션을 실행할수 있는 기능 (First, the ability to run Gtk+ applications inside a browser using HTML5.)
  2. Wayland display server를 지원(Second, initial support for the Wayland display server.)


GTK+ 3.2는 사용자가 바로 혜택을 누릴수 있는 수많은 소소한 기능을 소개합니다.

  • CSS Themeing 기능의 향상(CSS themeing support has been improved)
  • GtkFileChooser는 사용 할수 있도록 돌리었음. (GtkFileChooser has been overhauled)
  • GtkFontSelection 은 GtkFontChooser 위젯의 새로운 세트로 대체 되었음(GtkFontSelection has been replaced by a new set of GtkFontChooser widgets)
  • 여러 새로운 위젯들이 소개되었음(several new widgets have been introduced as well.)

GTK+3.2에서 HTML5의 지원은 여전히 실험적입니다. 이 것은 HTML5에 적합한 브라우저 안에서 계산기나 노트패드 어플리케이션류의 GTK+ 어플리케이션을 작동할수 있도록 허락을 해준다. 

아래는 Firefox 4.0안에서 GIMP를 실행하는 데모비디오입니다.


아래 동영상은 HTML5을 지원하는 Firefox4안에서 계산기와 Evince를 실행하는 동영상입니다.

Gtk+ broadway demo from Alexander Larsson on Vimeo.


또 다른 큰 새로운 것도 실험적인 것입니다. 알다시피 Wayland 자체는 매우 실험적인데, GTK+ 3.2 에서는 Wayland display server를 지원한다. 현재 많이 알려져 있는 X.org를 대신하여 미래에 많이 사용할 Wayland에 대해 GTK+가 미래를 위해 준비를 확실히 하고 있다.

QT또는 Wayland를 지원을 하는 중이기 때문에 두가지 오픈 소스 툴킷(GTK+, QT은 미래를 위한 준비를 하고 있다고 볼수 있습니다.


※ GTK+란? (What is GTK+)

GTK+는 그래픽 유저 인터페이스(GUI)를 만들기 위한 멀티 플랫폼 툴킷입니다. (아래서 부턴 알아서 번역을 바랍니다.)

GTK+ is a multi-platform toolkit for creating graphical user interfaces. Offering a complete set of widgets, GTK+ is suitable for projects ranging from small one-off tools to complete application suites.

GTK+ has been designed from the ground up to support a range of languages, not only C/C++. Using GTK+ from languages such as Perl and Python (especially in combination with the Glade GUI builder) provides an effective method of rapid application development.

GTK+ is free software and part of the GNU Project. However, the licensing terms for GTK+, the GNU LGPL, allow it to be used by all developers, including those developing proprietary software, without any license fees or royalties. GTK+ is the only 100% free-of-cost open source industrial-strength GUI toolkit available today.

Since its origins as the toolkit for the GNU Image Manipulation Program (GIMP), GTK+ has been used in a wide range of software. Notably, GTK+ is the foundation of the GNOME desktop.


Buy me a coffeeBuy me a coffee

저의 지인이며 비밀 스터디의 주도권을 가지고 계신 ganadist님께서 안드로이드 빌드 툴을 GTK와 Python기반으로 개발하셨다고 합니다.

아래는 저의 컴퓨터에서 실행한 화면으로 아직 Android Source kit을 받지 않았기 때문에 설정화면이 이상하게 되었군요.


(제대로 동작하는 화면의 경우는 그분의 동의를 받지 못해서 올리지 못하고, 주말 쯤 제가직접 프로그램 돌리는 스크린샷을 올리겠습니다.)


소스는 https://github.com/ganadist/abuild 에서 받을 수 있습니다.

안드로이드(Android)를 처음 접하는 초보자들도 쉽게 빌드 할수 있도록 GTK기반으로 UI를 구성한 후, 작성하였다고 합니다.


이 프로그램의 요구사항은 GNOME 3.0 개발환경에 맞게 만들어졌기 때문에 GTK+-3.0 이상이 설치되어야 한다고 나와 있군요. (GTK+-2.0과 GTK+-3.0간 호환성이 없다보니..)


* Requirements
	- python 2.6 or higher
	- pygobject 2.90 or higher
	- gtk 3.0 or higher with gobject-introspection
	- vte 2.90 or higher with gobject-introspection


실행방법

git으로 소스트리(참고 - https://github.com/ganadist/abuild  )를 받은 후 ./abuild를 실행하면 됩니다. 단 안드로이드 커널 소스를 미리 받으셔야 합니다.


* How to run?
	- change directory to source
	- run ./abuild
	 . need to fix for deployment
	- click "Source Top" button and select android source directory
	- if source directory has valid contents, "Build", "Product",
	  "Variant" button will be enabled
	  . TIP: If you set TOP shell environment and that is android
	    source directory, it will be set as "Source Top" directory
	- select check buttons and press "Build" button


ps. 제대로 빌드하는 모습을 다음 일요일에 제대로 된 실행화면을 블로그로 업로드할 예정입니다.

Buy me a coffeeBuy me a coffee


C언어로 63줄로 위와 같은 웹브라우저를 뚝딱 만들수 있습니다.

(제가 직접 프로그래밍 한 부분은 아니라서 소스 분석만 했다만 Webkit라이브러리를 잘 조합하면 위와 같은 웹브라우저를 금방 만들 수 있습니다)

#include <webkit/webkitwebview.h>

위의 헤더파일을 추가를 하고 컴파일 하면 웹브라우저가 돌아갑니다.

 GTK+라이브러리는 조금 안다는 가정하에 Webkit라이브러리와 GTK+를 이용하면 위와 같은 웹브라우저를 63줄만에 뚝딱할수 있습니다.

 라이브러리를 잘 만 이용하면 프로그래밍을 잘 할수 있습니다.

PS. Android에서도 Webkit라이브러리를 잘 이용하면 위와 같은 웹브라우저를 뚝딱 금방 만듭니다. 다만 언어가 Java라는것 차이 정도?


ps2. 다음에는 Android 에서 Webkit라이브러리를 이용하여 웹브라우저를 띄우는 방법을 올리겠습니다.


Buy me a coffeeBuy me a coffee
Windows에서는 Google Desktop을 설치를 하면 Gadget도 사용할 수 있지만, Linux에서는 Google Desktop을 설치하면 Google Desktop만 설치됩니다. Gadget은 설치가 안되죠.

이번에 연구실에 있는 CentOS에서 Google Gadget을 설치하기로 결심했습니다. Windows에 사용하는 것 처럼 Linux에서도 사용해보고 싶어서였죠.
그래서 Google에서 Beta로 제공하는 googld-gadgets-for-linux를 설치하게 되었습니다!!!
웹사이트 : http://code.google.com/p/google-gadgets-for-linux/
Google Gadget for linux Homepage

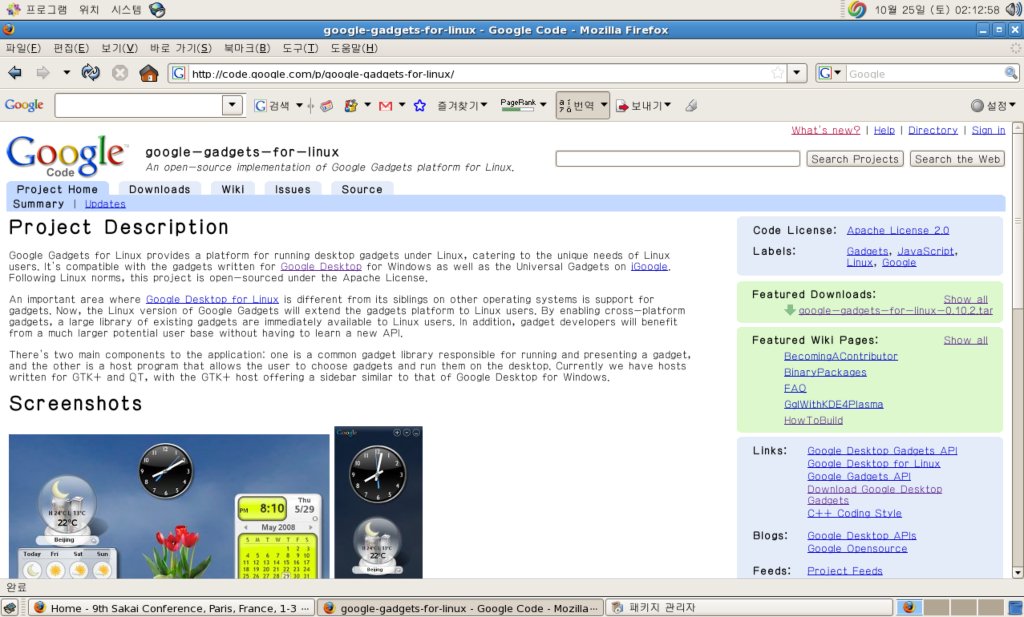
Google Gadget for linux Homepage (http://code.google.com/p/google-gadgets-for-linux/)


저도 Windows에서 쓰는 것 같이 Google Desktop Gadget을 사용하려고 삽질을 이룩하게 되었습니다.

우선 다운로드 받은 다음 /usr/local 폴더에 가서 압축을 풀고 컴파일을 하려고 했습니다.
컴파일 하기 전에 어떻게 빌드할 것인가를 참고해보고 빌드를 합니다.
(HOW TO BUILD http://code.google.com/p/google-gadgets-for-linux/wiki/HowToBuild )
위의 링크대로 설치하려고할때에는 CentOS에서 없는 것들이 나옵니다. ㅠㅠ
선수로 설치해야하는 패키지 중에서
Pre-requirements
You need install following packages in order to prepare and build the source code.
    * autoconf >= 2.50
    * automake >= 1.9
    * libtool >= 1.5.20

This project also depends on the following libraries:
    * SpiderMonkey >= 1.60
    * libcurl >= 7.15.0, openssl backend is required
    * libxml2 >= 2.6.0
    * zlib >= 1.2.0
    * xulrunner-dev >= 1.8
    * D-Bus >= 1.0.2
    * gstreamer and gstreamer-plugin-base >= 0.10.0

You can choose from the two toolkits: GTK or QT. If you choose GTK, this project also depends on the following libraries:
    * cairo >= 1.0.0, 1.2.0 or above is better.
    * gtk >= 2.8.0, 2.10.0 or above is better.

If you choose QT, the project also depends on the following libraries:
    * Qt and QtWebKit >= 4.3, (it's optional, and 4.4 is better).

These packages are included in most modern Linux distributions, you can install them using software management application provided by the distribution.

CentOS에서는 SpiderMonkey가 없습니다 ㅡ,.ㅡ
우선 설치한다고 configure를 실행시켰더니 아래의 메시지가 나오면서 설치를 하기에 껄끄러운 상황까지 옵니다.
[root@localhost google-gadgets-for-linux-0.10.2]# ./configure --prefix=/usr --disable-qt-host --enable-debug
Build options:
  Version                       "0.10.2"
  Install prefix                /usr
  Install included libltdl      yes
  Build shared libs             yes
  Build static libs             yes
  Enable debug                  no
  Host type                     linux
  OEM brand

 Libraries:
  GTK SVG Support               no
  Build libggadget-gtk          yes
  Build libggadget-qt           no
  Build libggadget-dbus         yes

 Extensions:
  Build dbus-script-class       yes
  Build gtk-edit-element        yes
  Build gtkmoz-browser-element  no
  Build qtwebkit-browser        no
  Build gst-audio-framework     yes
  Build gst-video-element       yes
  Build gtk-system-framework    yes
  Build qt-system-framework     no
  Build linux-system-framework  yes
  Build smjs-script-runtime     no
  Build qt-script-runtime       no
  Build curl-xml-http-request   yes
  Build qt-xml-http-request     no
  Build libxml2-xml-parser      yes

 Hosts:
  Build gtk host                no
  Build qt host                 no

configure: WARNING: Neither gtk host nor qt host will be built !!!
              Nothing can be used to run Google Gadgets for Linux.
어쩌라고? -_-;;

Hosts가 설정안되는 위 문제는 js, js-devel, nspr, nspr-devel패키지를 설치하면 됩니다.
설치를 하면 문제없이 컴파일을 할 수 있는 상태가 됩니다.
[root@localhost google-gadgets-for-linux-0.10.2]# ./configure --prefix=/usr --disable-qt-host --enable-debug
Build options:
  Version                       "0.10.2"
  Install prefix                /usr/local
  Install included libltdl      yes
  Build shared libs             yes
  Build static libs             yes
  Enable debug                  no
  Host type                     linux
  OEM brand

 Libraries:
  GTK SVG Support               no
  Build libggadget-gtk          yes
  Build libggadget-qt           no
  Build libggadget-dbus         yes

 Extensions:
  Build dbus-script-class       yes
  Build gtk-edit-element        yes
  Build gtkmoz-browser-element  no
  Build qtwebkit-browser        no
  Build gst-audio-framework     yes
  Build gst-video-element       yes
  Build gtk-system-framework    yes
  Build qt-system-framework     no
  Build linux-system-framework  yes
  Build smjs-script-runtime     yes
  Build qt-script-runtime       no
  Build curl-xml-http-request   yes
  Build qt-xml-http-request     no
  Build libxml2-xml-parser      yes

 Hosts:
  Build gtk host                yes
  Build qt host                 no

[root@localhost google-gadgets-for-linux-0.10.2]#

그리고 나서 아래와 같은 명령어를 치고 나서 컴파일을 합니다.
[root@localhost google-gadgets-for-linux-0.10.2]# make
[root@localhost google-gadgets-for-linux-0.10.2]# make install
컴파일하는 지루한 시간에는 딴 짓을 해도 좋습니다 ^^

그리고 나서 ggl-gtk를 실행시킵니다.
드디어 띄운 결과 화면!!
Google Gadget for linux setting

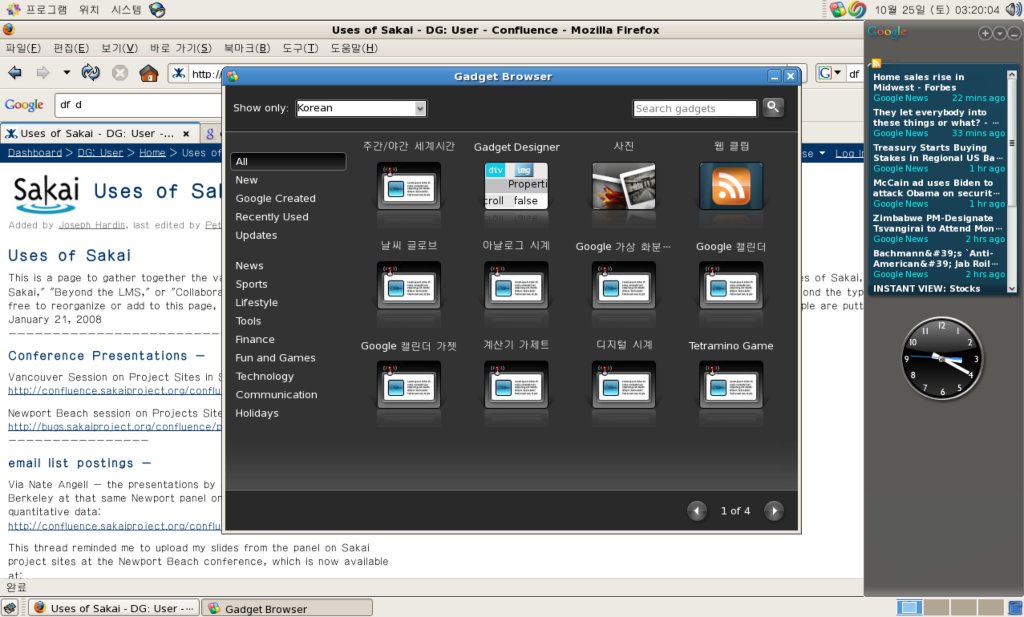
CentOS에서 드디어 설치한 Google Gadget실행화면입니다.


컴파일에러나오는 것 수정하느라 미치는 줄 알았죠.
Ubuntu에서 apt-get으로 패키지 설치하다, 오랜만에 컴파일 해서 설치하니깐 재미는 있는데 삽질을 해버렸습니다.

드디어 연구실에 설치한 CentOS로 Google Gadget을 맛보게 되어서 기쁩니다.
Buy me a coffeeBuy me a coffee

+ Recent posts